Web and mobile apps in fact are not that mysterious. We can use the Python scripts I shared before to create an application. Basically, the Python functional scripts for digital marketers I shared are the engine or the heart of these applications. The question is how to build an interface for others to use when a programming language is unnecessary to master.
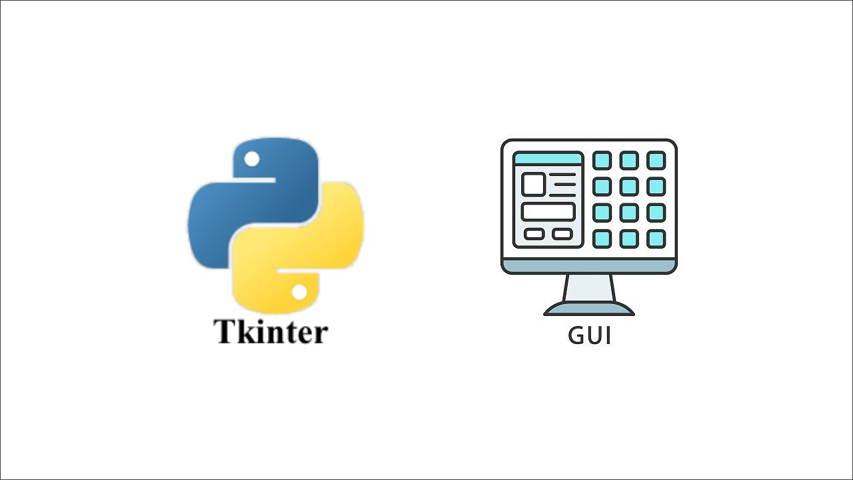
So in this Python Tutorial, I would take one of my Python tutorials – Google SERP Bot as an example. I would walk you through what modules and elements are necessary for the app built. By the end of this Python Tutorial, you can learn how to use Tkinter to build a Python GUI App framework, and integrate it with our Google SERP Bot python script.
Table of Contents: Python GUI APP
- What are GUI App and Tkinter
- Google SERP Bot GUI App
- Create a Skeleton and Framework of GUI APP
- Integrate with Google SERP Bot Script
- Open the Google SERP Bot App
- Full Python Script of GUI App with Tkinter Applied to Google SERP API
- FAQ
What are Python GUI APP and Tkinter
A graphical user interface, or what we call GUI, is an application. It has buttons, windows, and lots of other widgets that the users or your customers can use to interact with your application. In eCommerce marketing, a classic example would be a Profit Margin calculator. It has buttons, tabs, and the main window that contains different variable costs, and product price rows to fill in. Just by clicking a button, you can get the estimated profit margin instead of building a spreadsheet.
Regarding GUI App, the working flow behind is usin. g a programming script. So it can be a Python, or a Javascript GUI app as well, which depends on what programming language you are utilizing. In this piece, I would talk about Python GUI App which uses python scripts.
Python provides various options for developing graphical user interfaces. The big three are Tkinter, wxPython, and PyQt. Each of these toolkits will work with Windows, macOS, and Linux.
Tkinter is the standard GUI library for Python. Python, combined with Tkinter, provides a fast and easy way to create GUI applications. It also provides a powerful object-oriented interface to the Tk GUI toolkit.
Google SERP Bot GUI App
Frankly running a raw Python script every time is not convenient and not sharable as well. It’s because your colleagues or friends might not be familiar with the programming language. So a graphic user interface is critical. In this article, I would take one of the bots walked through before called Google SERP Bot as an example.
Chapter 11: Google SERP Bot to Scrape SERP Data Using Google Search and Easy2Digital APIs
As you notice, the Google SERP bot is very useful and helpful for PR marketers and content creators. It’s because you can just click a button to get the most popular and top-ranking pieces of content. It’s a great way to monitor the news environment or find ideas.
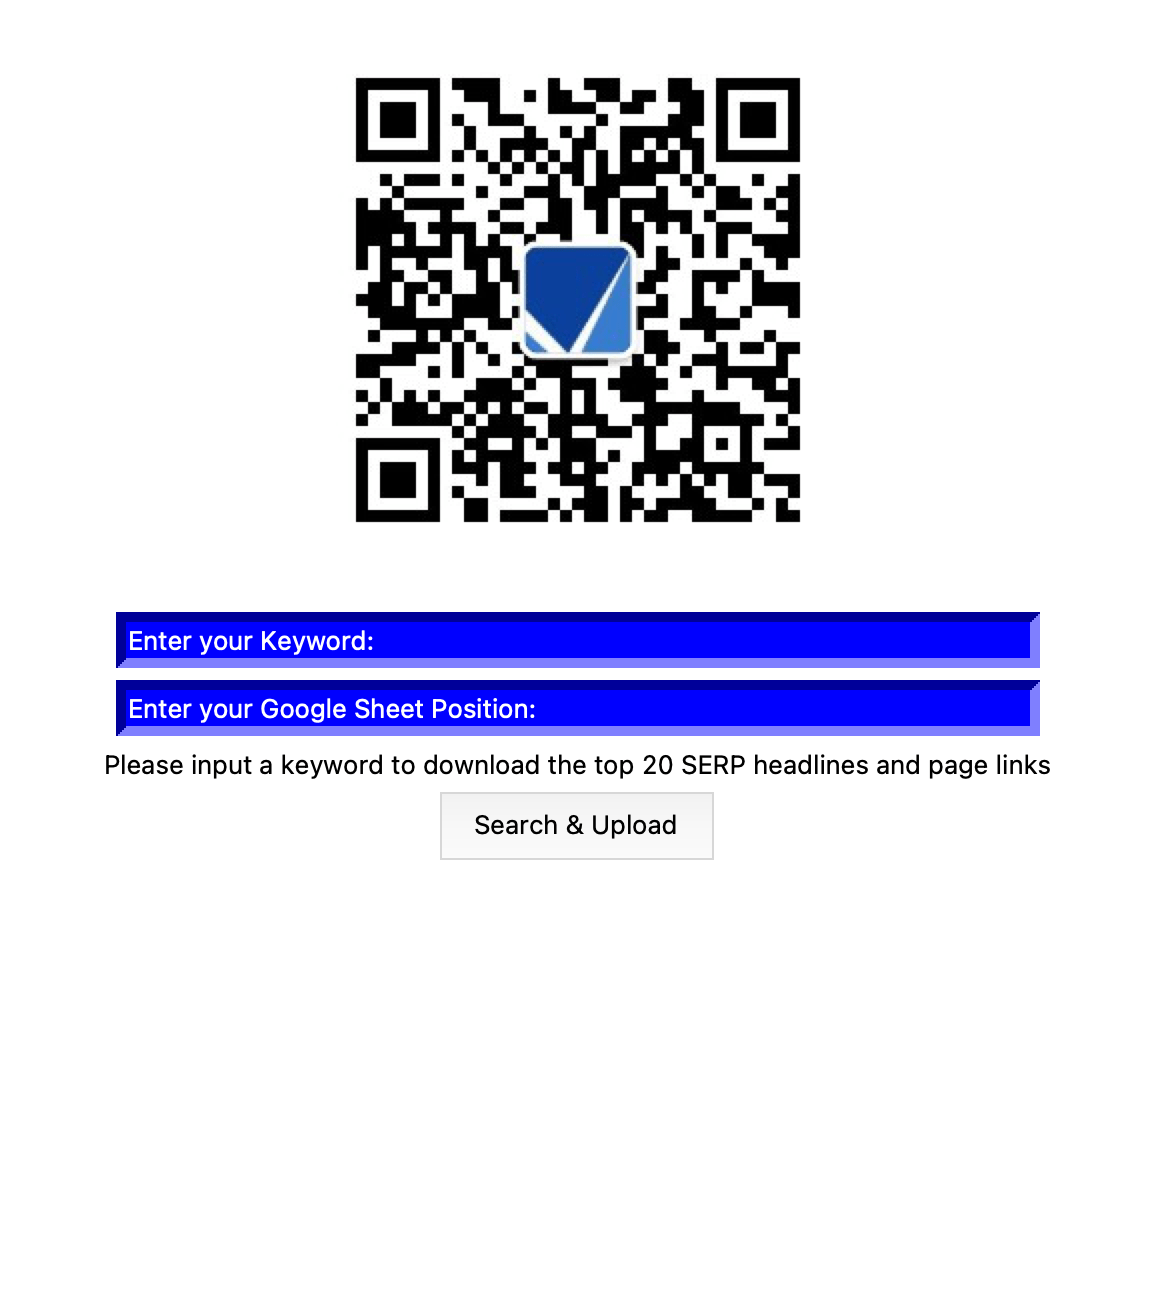
This is a graphic user interface that reflects the functionality of the Google SERP bot I shared with you previously. Basically, you just update the query keywords and locate the data stored in the position of the Google Sheets. Now you just need to activate this app instead of going to the raw script.
Create a Skeleton and Framework for the GUI App
Whatever the app you are going to create, there are some basic elements you need to add and core syntax you need to use.
First thing first, it’s the module and library. Installing Tkinter is very easy. Take Mac as the sample. You can open the terminal and just type in pip or pip3 install tk. The system would automatically collect tk and unzip the package information.
Then, add these modules to your Python script and here I also recommend askopenfile and pillow as well. It’s because you might require users to upload a list of keywords, or you need to add a logo and some photos decorating your GUI app
import tkinter as tk
from tkinter import *
from tkinter.filedialog import askopenfile
from PIL import Image, ImageTk
Create TK, Canvas and mainloop
After importing the modules, there are three must-have elements in any GUI app. The first one is to create a variable and add TK Functionality
root = tk.Tk()Then, before adding any specific widgets or elements, you need to create a Canvas or framework under those elements. You can set the width, height, and number of columns. I try to use a metaphor. This is like you categorizing a house with different rooms before moving furniture into each room
canvas = tk.Canvas(root,width=600,height=300)
canvas.grid(columnspan=3)
Last but not least, the application is not a one-off interface. So you need to add the mainloop function at the end of the script. It tells the system the users can use, again and again, to search different keywords again and again.
root.mainloop()Add Input box, Description, and Search Button
Now you can add specific elements to the Canvas framework. You might consider adding images or here I add the Easy2Digital China WeChat official account QR code – e
logo = Image.open('logo.jpg')
logo = ImageTk.PhotoImage(logo)
logo_label = tk.L. abel(image=logo)
logo_label.image = logo
logo_label.grid(column=1,row=0)
Then, the core part must be the input box. Entry function is for you to create an input box. You can create a variable for this. This variable is very important because you need it in the integration section in a moment.
Insert function is for you to remind users by descriptions what the input box is for. When you have many input boxes, users can identify what information they need to type in. It’s for avoiding wrong information.
What’s more, you might want to add an app title and description to tell what this app is used for. You can use the Label function for this purpose.
Grid function is for you to set the sequences and alignment. Under the framework you set in Canvas, you can assign the positions of these elements.
Footer = tk.Label(root, text="Please input a keyword to download the top 20 SERP headlines and page links")
Footer.grid(columnspan=3, column=0, row=3)
Last but not least, users need to submit these values and activate the loading. You would need a button. Here are the codings.
download_text = tk.StringVar()
download_btn = tk.Button(root, textvariable=download_text, command=lambda:open_file(), font="Raleway", bg="#20bebe", fg="black", height=2, width=15)
download_text.set("Search and Download")
download_btn.grid(column=1, row=4)
One of the key arguments is the command and lambda. Open_file () is a custom definition of the function. In this function, basically, it’s the Google SERP Python Bot. You tell the system which script you are going to run.
Integrate with Google SERP Bot Script
Basically now the skeleton, framework, and elements in the framework are ready. Next step, you need to add an engine. The engine is the Google SERP bot script. The question is how to connect it with the GUI app.
There are two core elements in these sections except for the bot script. If you would like to have the full version of the Python Script of Google SERP scraper, please subscribe to our newsletter by adding the message Python Tutorial 11. We would send you the script immediately to your mailbox.
They are the keywords and storage location values submitted by the users and the get function. This function is to feed the values to the Google SERP bot script.
e1 = e.get()
e3 = e2.get()
As earlier mentioned, you need to create a custom-defined open_file () function in this GUI App. This function is connected with the TK button command. Once the user clicks the button, it will activate this custom function. It means activating the Google SERP bot. Until here, the Google SERP bot app is done.
Open the Google SERP Bot App
It’s supposed we can have an execution file to activate every time. I will walk through this in the next Chapter – how to convert the Python script into an execution app.
For the current GUI app, I take Mac as the example and use the terminal to activate it.
We can use two commands. One is the cd, and the other is python3. CD is used to locate the path of this GUI app script. Python3 is used to activate the GUI app script file. Once you did, this interface would pop up in your computer.
Just kindly remind you that please ensure all the related element files are located in the same path of this script, such as photos, json, etc.
Full Python Script of GUI App with Tkinter for Google SERP Bot
If you would like to have the full version of the Python GUI App with Tkinter for Google SERP Bot, please subscribe to our newsletter by adding the message “Chapter 25”. We would send you the script i. mmediately to your mailbox.
So easy, right? I hope you enjoy reading Chapter 25: Build a Python GUI App with Tkinter. If you did, please support us by doing one of the things listed below, because it always helps out our channel.
- Support and donate to our channel through PayPal (paypal.me/Easy2digital)
- Subscribe to my channel and turn on the notification bell Easy2Digital Youtube channel.
- Follow and like my page Easy2Digital Facebook page
- Share the article on your social network with the hashtag #easy2digital
- Buy products with Easy2Digital 10% OFF Discount code (Easy2DigitalNewBuyers2021)
- You sign up for our weekly newsletter to receive Easy2Digital latest articles, videos, and discount codes
- Subscribe to our monthly membership through Patreon to enjoy exclusive benefits www.patreon.com/louisludigital