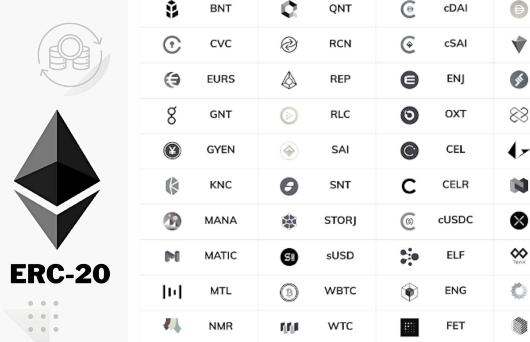
Tokens are not new things we’ve already been using their similar forms daily, for example, fiat currency, ID cards, casino chips, stock certificates, and so on and so forth. In Web 3.0, tokens are basically divided into fungible tokens and non-fungible toke (NFTs), which are the atomic unit of Web3. And ERC20, or Ethereum Request for Comment 20, is the implemented standard for fungible tokens created using the Ethereum blockchain.
In this article, I would go through how to build your owned Web3 fungible token (ERC20) using Python, brownie, solidity, and Openzepplin. By the end of this article, you can learn a basic flow to build it and start tokenizing your things.
Ingredients on Web3 Fungible Token – Build an ERC20 Token Using Python, Brownie, and Solidity
Python, brownie, solidity, Openzepplin
Table of Contents on Web3 Fungible Token
- Openzepplin & Name your unique Token
- Deployment scripts using Python
- Brownie-config and .env
- Add the token to your main network
- Full scripts of building a web3 fungible token ERC20 using python, solidity
- FAQ
Openzepplin & Name your Unique Token
First thing f. irst, building a token also starts from the smart contract and its constructor code writing. Nevertheless, it has quite lots of open-source code out there. This article would use OpenZeppelin. Please go to Openzeppelin documentation and open the token ERC20 section and copy these codes as follows to your script:
// contracts/ourToken.sol
// SPDX-License-Identifier: MIT
pragma solidity ^0.8.0;
import "@openzeppelin/contracts/token/ERC20/ERC20.sol";
contract ourToken is ERC20 {
 constructor(uint256 initialSupply) ERC20("ourToken", "louisToken") {
 _mint(msg.sender, initialSupply);
 }
}
Please be sure to modify the name, which separately is the contract name and your token name
ourToken
louisToken
Then, the next step is just compiling using brownie and it’s done!
Deployment Scripts Using Python
After having compiled the smart contract, it’s time to create the deployment script using Python. Basically, it’s the same as our previous projects, which used the Web3 module and the smart contract to deploy the specific account.
from brownie import ourToken
from scripts.assistant import get_account
from web3 import Web3
initial_supply = Web3.toWei(1000, "ether")
def main():
 account = get_account()
 our_token = ourToken.deploy(initial_supply, {"from": account})
 print(our_token.name())
Brownie-config and .env setting
As we are using the Openzepplin smart contract modules, so it’s necessary to map the module scripts in brownie-config.yaml as well as we did in other projects. Below is the 4.8.0 version we used at the moment.
dependencies:
- OpenZeppelin/openzeppelin-contracts@4.8.0
compiler:
 solc:
 remappings:
 - '@openzeppelin=OpenZeppelin/openzeppelin-contracts@4.8.0'
For grabbing the up-to-date version, please go to google Openzepplin contract GitHub and use the latest version.
Regarding the wallet, network, and .env setting in YAML, basically, they are all same as settings in other Web3 projects we walked through before. Thus, please refer to other articles in the Easy2Digital Web3 collection. Here are two for your references
Brownie FundMe Smart Contract Deployed on Ethereum Using Python & Web3
Add the Token on the main network (Test one in this article)
Once all settings are done, we can run the script with the selected network and proceed it deploying on the live blockchain network.
Command:
Brownie run scripts/deploy_token.py –network goerli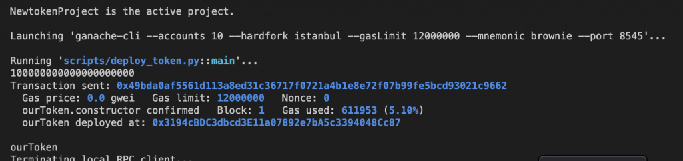
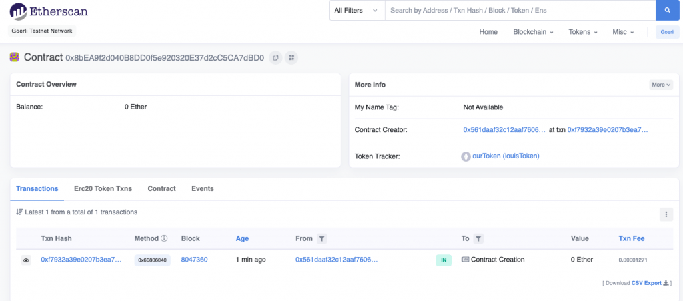
The transaction is transparent so we can go to Etherscan to check the record.
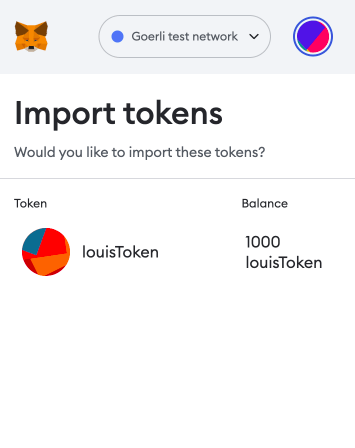
Then, for adding your owned fungible token to your wallet, please add the token deployed address to your wallet, for example, MetaMask. Here is the step sample:
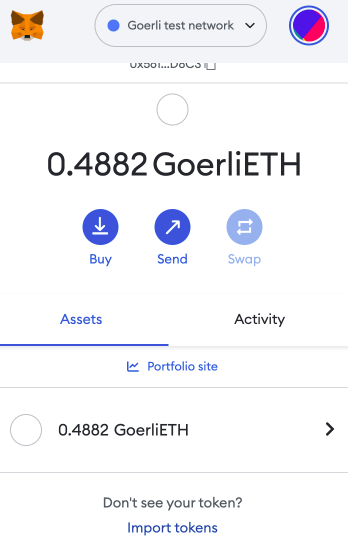
Your token name would automatically be detected and popped up in the window after having input the address

Done!!
Full Scripts of Building a Web3 Fungible Token ERC20 Using Python and Solidity
If you are interested in Web3 Fungible Token – Build an ERC20 Token Using Python, Brownie, and Solidity, please subscribe to our newsletter by adding the message “Web3.0 tutorial 6”. We would send you the script immediately to your mailbox.
I hope you enjoy reading Web3 Fungible Token – Build an ERC20 Token Using Python, Brownie, and Solidity,. If you did, please support us by doing one of the things listed below, because it always helps out our channel.
- Support and donate to my channel through PayPal (paypal.me/Easy2digital)
- Subscribe to my channel and turn on the notification bell Easy2Digital Youtube channel.
- Follow and like my page Easy2Digital Facebook page
- Share the article on your social network with the hashtag #easy2digital
- You sign up for our weekly newsletter to receive Easy2Digital latest articles, videos, and discount codes
- Subscribe to our monthly membership through Patreon to enjoy exclusive benefits (www.patreon.com/louisludigital)